home page
glass notes
photo library
shop windows
previous page
e-mail us

cleaning & restoring glass

N.B. While we believe all the information provided on these pages to be correct, we cannot be held responsible for any damage arising out of the use of any of the cleaning, repair and restoration techniques described, which are used entirely at the reader's own risk

page 2: restoration

  • foreword
  • tools & equipment
  • general rules
  • satinised or frosted glass
  • water damage
  • chips
  • scratches
  • bruises
  • stuck stoppers
  • enamelling & gilding
  • metal mounts
  • foreword

    Most glass collectors are, in my opinion, far too fussy when it comes to condition. It is true that if a piece is relatively common, or recently made, it is more important (and certainly easier) to acquire one in good condition

    But most glass, just like china, was made for practical use, and very few pieces that have survived any length of time will have done so in pristine condition. While china collectors, however, will tolerate small chips, crazing, scuffing, cracks (with or without rivets) and even restored pieces, glass collectors are generally very unforgiving of the slightest damage. Even more astonishingly, some collectors will refuse otherwise perfect pieces (even Victorian or older) with minute manufacturing imperfections, such as tiny pieces of slag or bubbles in the body or small crease-lines from the press-moulds!

    However, as Eric Knowles (for those who have never heard of him, he is a well-known British antiques expert) has gone on record as saying, some damage on older and rarer items is permissible, and will have no significant effect on value. To take an extreme example, if you look at museum collections, you will see glass antiquities that have been completely shattered and then glued back together

    A shallow chip, a small bruise, a slight bloom of water-damage, a few surface scratches or a small amount of lost or worn enamelling or gilding should not be allowed to put you off, especially if the alternative is to have a long-term glaring gap in your collection

    More serious damage such as larger chips, more extensive scratching or water-damage, or loss of a large proportion of enamelling or gilding may still be worth considering if the piece is sufficiently old or rare. I would not, however, recommend buying anything with a crack in it, or which has been broken and restored by glueing or riveting, or extensively cut or ground down, unless it is practically unique

    So if you do see a piece that has been missing from your collection for a long time, but has a little damage, I would advise you to buy it (assuming the price reflects the condition). How long are you going to have to wait, you should ask yourself, before you find a perfect example?

    Having bought your slightly damaged piece, you may want to start doing your own repairs and restoration (you brave person!). If so, read on

    back to top of page

    tools & equipment

    As with cleaning, you can't buy a ready-made "glass restoration" kit, so you'll have to assemble your own. Again, some tools can be found in your local hardware store, some from hobby-shops or specialist jeweller's suppliers, and some you will make for yourself. Here's a basic selection of essentials, most of which you will require:

    • somewhere to work, preferably equipped with a sturdy bench. Be warned, this can be a messy business, so don't even think of doing it near your best furnishings.

    • some old clothes or, better yet, a three-quarter-length apron (I told you it could be messy!)

    • a reel of masking-tape. This is useful for protecting the area around a repair against accidental damage when using a whetstone or grinding-wheel

    a selection of sheets of wet-and-dry emery paper (which you will almost always use wet). The coarseness of the sheets is graded in 'grit', and is printed on the back of each sheet. '240 grit' is about as coarse as you are ever likely to need, '1500 grit' is extremely fine (I don't know how much lower or higher they go), and they are readily available from DIY centres, builder's merchants, autoparts or hobby-shops. The finer the grade of finishing-paper you use, the less polishing will be required

    We have also been made aware (although we have not tried it) of an American product called 'Micro-Mesh', originally invented to reclaim scratched Perspex canopies fitted to fighter aircraft. It consists of grit (grades apparently go from 600 up to a staggering 12000) suspended in a thin film of a rubbery substance and then cloth backed. It can be used dry but is better wet, can be washed and is extremely long-lasting. The following suppliers have been recommended by readers (many thanks to Rob Carter, Chris Cooper, Greg Brookes and Bernard Riches):

  • DEP Fabrications (UK)

  • Sylmasta (UK)

  • Eternal Tools (UK)

  • Micro-Surface Inc (USA)

    Also (thanks to Frank Evans) Micro-Mesh is apparently obtainable from: Conservation Resources Ltd, Unit 1, Pony Road, Horspath Industrial Estate, Cowley, Oxon OX4 2RD (tel: 01865-747 755)

    In addition to the above, Tony, of Glass Technics, tells me that his company manufacture a do-it-yourself kit 'which will remove scratches in glass without causing any distortion to the glass'

  • at least one flat whetstone (and possibly several, of differing coarseness like the emery-paper). These come in different shapes and sizes, and are made for sharpening various implements, from sickles (coarse) to chisels (fine). Some are intended to be lubricated with oil, but will still work well with water. Have a hunt around all the usual places for them. Always use wet

    a plastic water-atomiser such as can usually be found at garden centres for misting the foliage of plants. This is the most convenient way of applying a controlled amount of water to your emery-paper, whetstone, grinding-wheel etc

    For speedier work and a better finish you will need a power-drill or hobby-drill, with most of the following:

    some grinding-wheels. These are not essential, and must be used with a great deal of care, but are occasionally useful for major grinding jobs. Be careful, most of the wheels commonly available are much too coarse for use on glass - you will probably only find fine-enough wheels in a jeweller's supply shop, or possibly a craft-shop. Always use wet

    one or more foam-rubber sanding drums. These come with a metal core which fits into your drill, and are intended to work with replaceable sanding-belts, which fit snugly around them. All the ready-made sanding-belts are very coarse, but, with a pair of scissors and some strong duct-tape you can make up your own sanding-belts from any of your sheets of emery-paper. The results you get will make the effort well worthwhile. Always use wet. As belts are used, they become less abrasive, but are then still useful for final polishing.

    N.B. Regarding this last statement, a reader (Derek Carter) writes: "Whilst this is true, they are less abrasive due to the grains of abrasive becoming blunt. 240 grit is still 240 grit, regardless of whether it is used or fresh. You therefore run the risk of re-introducing scratches, rather than polishing them out. Given the VERY small cost of abrasives it is far better to discard worn abrasive rather than risk using it to try and polish. Also it is best to rinse off the glass thoroughly between grits to ensure no rogue particles remain of the coarser grit". Thanks for the advice, Derek

    some hard felt polishing pads (they usually come in sets, in a selection of different shapes), a cloth polishing-wheel or two (left - these are made of many layers of cloth sewn together, usually with a metal/leather reinforced centre), and a 'pigtail' (lower right). This is made of steel, with a shank that fits into your drill-chuck like a normal drill-bit. The top is conical and threaded, and your felt pads and cloth wheels screw directly onto it. Buy one with as long a shank as possible - the further away you keep your glass from the revolving drill-chuck, the less likely you are to accidentally scratch it

    some abrasives (for use with your felt pads and cloth wheels for final polishing) such as 'jeweller's rouge' (from jeweller's suppliers), polishing compounds (left - various makes available, mostly intended for use on metals, but they work fine on glass; consult your local craft- or hobby-shop), cream or liquid silver-polish (right)

    Also useful, but not essential, are:

    • a bench-clamp for your drill (particularly when using the sanding-drum)

    • a flexible adapter (makes getting down into narrow openings both easier and safer)

    back to top of page

    general rules

    There is, of course, no absolutely right or wrong way to go about making repairs to a piece of glass. If it comes out well, you did a good job. If it looks worse than it did before, well ....

    Here's some advice that may prevent the air around you turning blue:

    • if you're not 100% committed to learning how to repair glass, QUIT NOW
    • shortly after you have ruined your first piece, you will regret having started
    • practise each technique on a worthless piece before trying it for real
    • be patient, and work slowly and carefully (you will get quicker, eventually)
    • don't panic - when repairing glass, things always look a lot worse before they look better
    • keep your power-tools on a slow setting and pause frequently to allow the glass to cool down
    • keep grinding-wheels, whetstones and emery-paper wet
    • don't take short-cuts. Once the heavy work is done with whetstone or grinding-wheel, use gradually finer grades of emery-paper, making sure you have done the maximum you can with each before going on to the next
    • keep polishing-pads and wheels supplied with abrasives (and don't forget - pause frequently to allow the glass to cool down)

    If you bite the bullet and stick with it, you may even turn out to be a good glass repairer - I wish you the very best of luck!

    back to top of page

    satinised or frosted glass

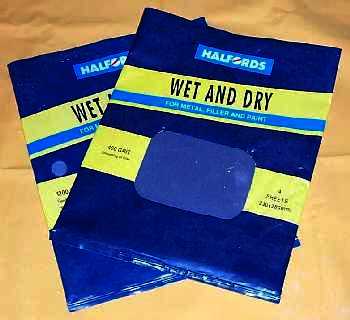
    One problem with satinised or frosted glass items (as stated on the previous page) is that the rough surface (being effectively like a whetstone itself), if knocked against a metal object, can pick up metallic smears and scuffs which are hard to shift by normal cleaning methods

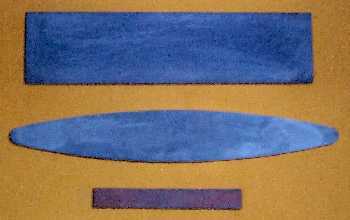
    If, having tried all the normal methods, you find this to be the case, you will have to adopt more drastic solutions. The most effective way is to use your moistened wet-and-dry emery paper to remove such smears. Select a paper of similar coarseness to the surface on which you are working (too coarse and you risk leaving obvious scratches - too fine and the area will end up appearing more polished than the rest). Using a small circular motion, begin on the smear itself, and then gradually work outward with ever-decreasing pressure so that your repair blends in with the rest of the surface. A pad of wire-wool with some abrasive paste over the area may further hide the restoration if required

    Chips on satinised or frosted glass are dealt with initially as on a glossy piece, stopping the emery-paper process as soon as the surface roughness of the repair matches that of the surrounding area. This is the only time that the emery-paper is sometimes best left dry

    back to top of page

    water damage

    Water damage (or water staining) is a superficial (only a few molecules deep) fogging of the surface caused by an actual change in the chemical structure of the glass when a vessel is left containing liquid for long periods. To avoid it happening, vases, decanters etc. should be washed out and thoroughly dried, and rested for a while between uses.

    Professional glass repairers and restorers (see under links & useful addresses) can remove water-damage very successfully either by (a) flushing the vessel out with a mixture of hydrochloric and hydrofluoric acids, or (b) mechanical polishing with abrasives on felt-pads, both of which processes remove the damaged 'skin' of the glass. The first process is extremely dangerous, and should be left strictly to the professionals

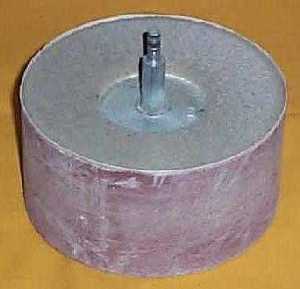
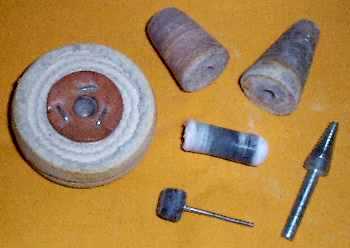
    Mechanical polishing is possible for an amateur

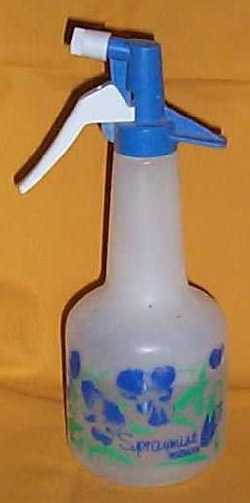
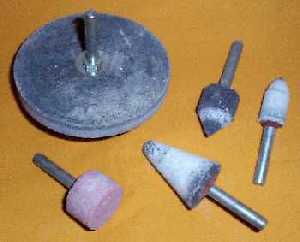
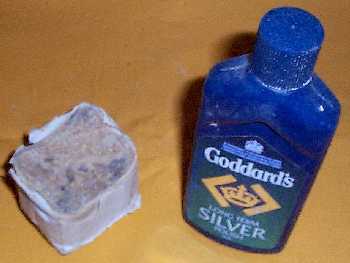
    First, you must make sure to remove all traces of limescale, using a proprietary limescale-remover with a stiff brush or wad of wire-wool, then wash and dry your piece thoroughly. You will then need to use your drill, 'pigtail', felt pads and/or cloth-wheel, and abrasives. If you haven't got a power-drill, you may obtain slight improvement by hand, using abrasives on a cloth, but it's hard work

    The results of your efforts will probably not be as good as a professional's (although you will get better at it in time), but you will considerably improve the appearance of your piece, and avoid paying the cost of professional restoration, which is generally only worthwhile for more expensive pieces

    Some people claim success in removing water damage by using denture cleaners such as 'Steradent', dissolving a couple of tablets in water, filling the vessel and leaving overnight. Since I have not tried this yet, I cannot say if it works or not. I have to say it sounds unlikely to me, although I could well believe it removes limescale. Still, I can't see that it would do any harm

    back to top of page

    chips

    Unless these are very small, repairing chips is best left to the professionals, who will do a far better job than you can for a surprisingly small cost.

    If you insist on having a go yourself, you will need the following :

    Shallow chips on the rims of vases or drinking-glasses are somewhat easier:

    • pick your coarsest sheet of emery paper and secure it with pins on a flat wooden board.
    • wet the sheet and place the vase or glass, upside down, upon it
    • move it around with a circular motion and slight downward pressure, adding more water when necessary
    • when the chip has virtually disappeared, change to the next finest sheet, and so on
    • finish by polishing with your power-drill, and hard felt pads, with abrasive polishing compounds

    All that to save between £3.00 and £5.00? I don't think so!

    If a chip is very deep, and to polish it out would substantially alter the shape of the piece, you might consider filling it in instead. This is best done with an opaque resin filler (such as 'Milliput') in the case of opaline glass, or a colourless glue (such as 'Loctite' glass glue - needs ultraviolet light to cure it) in the case of clear glass or crystal. These can both be (a) coloured with dyes or stains before use, (b) carved, sandpapered and polished afterwards, or (c) painted over with enamels or gilded (see enamelling & gilding)

    back to top of page

    scratches

    Very light surface scratching can be improved by using your power-drill, hard felt pads and abrasive polishing compounds, and a lot of patience

    Serious scratches are another thing usually best left to the professionals

    While it is relatively easy, using your whetstones and range of emery papers, to smooth out even fairly severe scratching, it is then extremely difficult for an amateur to restore the original, glossy surface of a piece of glass, or even something approaching it

    Indeed, unless you are well-equipped, have the patience of a saint and the skill of an artist, you may well end up making your piece look worse than it did in the first place

    Particularly difficult and 'unforgiving' are totally clear pieces (such as much Scandinavian glassware), or pieces with an iridescent finish (which will simply disappear if you try polishing it)

    Pieces that are fairly deeply-coloured, however, or which have a casing of clear glass over a multicoloured interior (such as, for example, W.M.F. Ikora-glass) are fairly 'forgiving', and can be successfully polished more easily

    back to top of page

    bruises

    Bruises are impact-marks, usually circular, that somewhat resemble bullet-holes in armoured-windows (as seen in most James Bond movies). They are wickedly deceptive. However small they may appear to be on the surface, they always go a lot deeper than you imagine they will, and may spread sideways as well. For this reason, they are best left alone in most cases

    If you must have a go, treat them exactly as you would chips

    back to top of page

    stuck stoppers

    Theories abound as to the best way to unstick stoppers. Some professional repairers offer a stopper removal service. If you want to try it yourself, use common sense, and go gently. This is how I go about it:

    • often the stopper is stuck in the neck by a layer of whatever the bottle contained (perfume, sherry etc.). If a solution of biological detergent can be introduced around the stopper, it can sometimes dissolve this, so try leaving your bottle completely immersed in a bucket of warm water and biological detergent for a few hours (or even days of you are in no hurry). Rinse thoroughly (so you can get a good grip) and pull gently but firmly on the stopper, giving it a very slight sideways, rocking movement as you pull, and rotating the bottle occasionally as you go. N.B. using biological detergents is not recommended on enamelled or gilded glass
    • ordinary washing-up-liquid may work okay, and a colleague recommends using shower-gel, as it contains both soap and oils
    • if none of these work, try spraying around the neck with a thin penetrating oil like 'WD40', or an electrical switch-cleaner like 'Super Servisol', or pouring a little surgical spirit around it. As before, leave it for a while before trying to move it (don't forget to wipe off the oil or spirit with kitchen-towel beforehand)
    • it may also help to build up the air-pressure inside the bottle. This is best done by taking the bottle and immersing it in a bowl of fairly warm water (not too hot) for a couple of minutes before trying to shift the stopper again
    • sometimes the stopper is wedged rather than stuck, inserted by someone with more brawn than brain. Using any or all of the above techniques may help, but sometimes more drastic measures still may be required (and which are not to be recommended for a really valuable piece), such as rotating the bottle while gently tapping the stopper sideways with a piece of wood (or a wooden or plastic mallet), in between attempts to move it. It may also help to manufacture a wooden 'collar' (a roughly circular piece of plywood with a slot from the edge to the centre, big enough to accomodate the neck of the stopper), which can then be tapped in different places. N.B. before you try any of this, be sure to check that both the stopper and bottle-neck look sturdy enough to withstand such treatment, and be sure to provide a soft landing-place for the stopper (such as a piled-up blanket) as it will sometimes fly out and take you by surprise!

    Above all, do not forget that a bottle with its original stopper, even stuck, is likely to be worth more than a bottle with a replacement stopper, so don't push your luck!

    back to top of page

    enamelling & gilding

    Personally, we would only ever buy enamelled or gilded pieces which are in good enough condition as they stand. You might, however, have a family heirloom of great sentimental value, but which has seen better days and would benefit from restoration.

    Most original enamelling and gilding will have been fired on the piece for permanence. The only enamelling or gilding you will be able to do will be cold, and therefore easily scratched off

    Specially made cold glass-enamels can be bought from most craft- or hobby-shops, or stained-glass suppliers, and are available in transparent or opaque colours

    For gilding, I would recommend using a metal powder (obtainable from artists' supply shops, and available in a range of colours such as new gold, antique gold, copper, bronze etc). This can be mixed with a little clear varnish, and gives a more permanent result than ready-mixed gold paint, which tends to go dull quickly

    If the piece is potentially valuable, you will be better off entrusting it to a specialist restorer of enamelling, gilding and gold-leaf. Some of the general glass repairers and restorers may also undertake this sort of work (see links & useful addresses for a list of some UK restorers)

    back to top of page

    metal mounts

    Late 19th Century and early 20th Century glass is often found with attached metalwork of one sort of another. This is usually either solid silver, silver-plated, pewter, copper or brass, and can be cast or hand-beaten. Such metalwork was sometimes to provide strength or improve functionality (rims, spouts, handles, feet, flower-grilles, and hinged fittings for things like powder-pots, inkwells etc), and was sometimes purely decorative (frameworks of flowers or foliage - found most often on Art Nouveau glassware)

    The usual method of fixing metalwork to the glass was by using Plaster of Paris. This (a) holds the glass snugly within the metal frame, (b) provides a water-resistant seal, (c) is easily replaceable when it becomes broken or discoloured - or if the glass needs replacing, (d) is a very 'forgiving' material, which can be wiped or scraped away very easily if it gets anywhere it shouldn't, and (e) it allows the glassblowers to work to larger tolerance, as it can be used for filling any size of gap. Plaster of Paris can still be obtained from a Chemist (Pharmacy or drugstore) and is found in most Craft shops. In an emergency, Polyfilla makes a reasonable substitute, but the real thing is better. Although we have come across all kinds of substitutes used by amateur restorers (including various glues, and even fillers for repairing car bodywork!), we would always recommend using the genuine article - mainly because it's easier! Here's how to use it:

    (1) remove the old plaster from both the metalwork and the glass. Soaking the piece for a few hours in warm water (a little liquid soap may help) will soften the plaster, and should allow it to be picked out. Unless you can trust yourself to go VERY slowly and carefully, avoid using sharp metal tools, as you risk damaging the metal or the glass. Hard plastic is a safer material to work with - you can make your own tools with it, or buy ready-made sculptor's tools (if the plaster is particularly stubborn, you may have to soak it more than once)

    (2) separate the metal from the glass. Once most of the plaster has been picked out, the metal frame will loosen. To separate it from the glass, you may need to exert a gentle 'pull' and 'twist', but be very careful not to overdo it! Do NOT try levering the glass out of the frame with an implement - you will almost certainly break it!

    (3) clean off any remaining plaster from either piece, then dry them (if you intend to polish the metalwork, this is a good time to do it)

    (4) mix some Plaster of Paris and water to a 'creamy' consistency. If the mixture is too stiff, it will not fill in all the gaps. If it is too loose, it may fall out in places, before it has set

    (5) apply the mixture to the metal frame, using a spatula, making sure it gets into all the crevices (a toothpick may help to push it into narrow spaces). Be fairly generous when applying the Plaster mixture - it is easier to remove excess than to later refill gaps you have missed! Now present the glass to the Plaster-filled frame and press it in, gently but firmly

    (6) allow the plaster to set. After an hour or so (times may vary), the plaster will be set, but has not yet become completely hard. This is the ideal time to:

    (7) clean off any excess Plaster, using plastic or wooden tools. Just remove major excess at this point, and take care not to remove any Plaster from inside the frame

    (8) carry out a final clean next day, by when the Plaster will have gone hard, using an old toothbrush. Finally, wash and dry the re-assembled piece

    As with any restoration technique, slow and steady does it, and practice makes perfect!

    back to top of page

    .... go back to to   page 1: cleaning